


This article introduces you to the World of Web Application Firewall and especially shows you how to setup a WAF on a Cloud Platform. For demonstration purpose, we focus here on the setup of a WAF on the platfrom Xelon HQ.
Web Application Firewalls Introduction
Firewalls ensure the security of the network and its applications from well-known threats. In the world of network security, we have standard network firewalls and Web Application Firewalls.
A standard network firewall protects your entire network infrastructure and operates at layer 3 to 4 of the OSI/TCPIP model (network and transport).
Threats related to routing and the transmission of network communications (Internet Protocol, TCP & UDP) can quickly be averted using rules set up, such as IP origins, ports, and access control lists.
A Web application firewall operates at layer 7 (application) of the OSI model and ensures the security of web applications from well-known threats. So, how does a WAF function differently from a standard network firewall? An attacker could present legitimate HTTP requests to the web application, which successfully go through the standard Network firewall and reach your applications. For example, a WAF can help mitigate attacks such as HTTP flood attacks that the traditional network firewall would not capture. It allows all the requests to go through defined rule sets and use well-designed algorithms such as anomaly detection, heuristics, and signature-based algorithms to curb attacks.
Web Application Firewalls have passive and active modes.
The comparison is that passive allows all traffic and reports on detected activity, while active detects and mitigates threats. It is good security practice to set up production workloads in active mode and passive for testing purposes only.
A WAF achieves web application security through a standard set of rules known as OWASP ModSecurity Core Rule Set.
The rule set has detection rules to prevent the OWASP Top 10 web application security risks such as Injections, cross-site scripting, insecure deserialization, and other web application security risks.
There is also the possibility to define new rules to meet the security requirements of your applications.
Quick Tip:
Xelon HQ provides both WAFand standard network firewall services to meet your network and application security requirements.
Why you should use the WAF service in the Xelon HQ:
- By default, the WAF service uses the OWASP Modsecurity core ruleset (CRS) in Active mode.
- The WAF in Xelon HQ is a managed service, which means you don’t need to worry about the scaling requirements of your WAF, and how to set it up.
- No more time-consuming evaluations: The Xelon HQ allows a more straightforward selection of a WAF out of a preselected range of providers.
- The WAF smoothly integrates with the other infrastructure services in the Xelon HQ. You can use the same WAF across multiple workloads (Linux and Windows) on the same network.
Extra Tip
It is good security practice to combine Web Application Firewall capabilities with a standard network firewall.
Setting Up a Web Application Firewall
In this section we show how to setup a Web Application Firewall by using the Xelon HQ.
Prerequisites
- A Xelon HQ web account. (You can sign up and test it for free)
- Web server virtual machines (devices).
- IP addresses added to the Local Area Network (LAN) and Wide Area Network (WAN).
Step 1: Access the portal and create a virtual network.
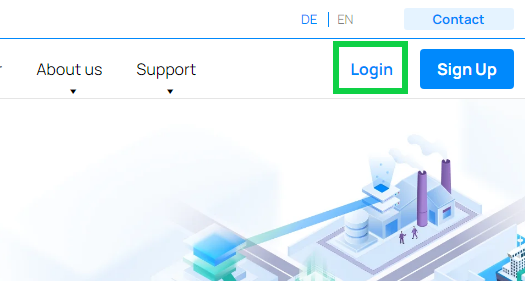
To get started creating a Web Application Firewall in the Xelon HQ, log in to the web portal on xelon.ch
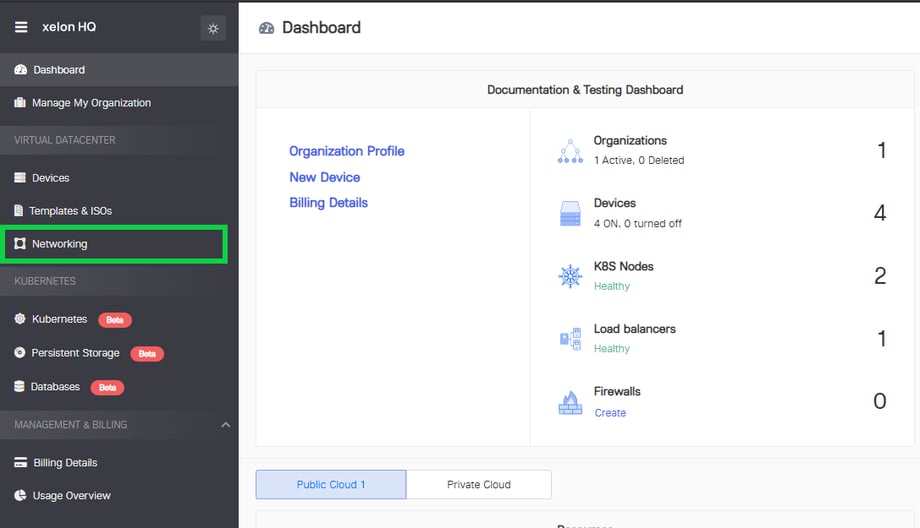
Select the ‘Networking’ section on the Xelon HQ dashboard.
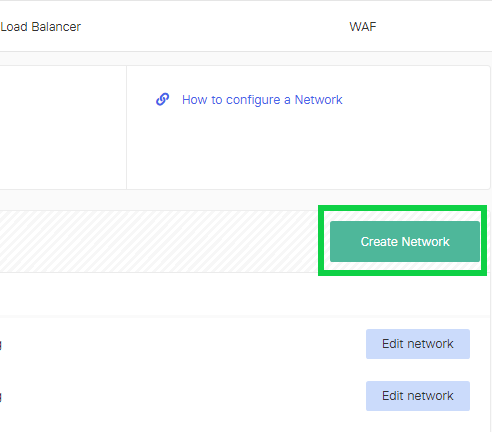
On the right side of the screen, select ‘Create Network’. You can also use an existing network. Please note that this article is focusing on creating a WAF on a new network.
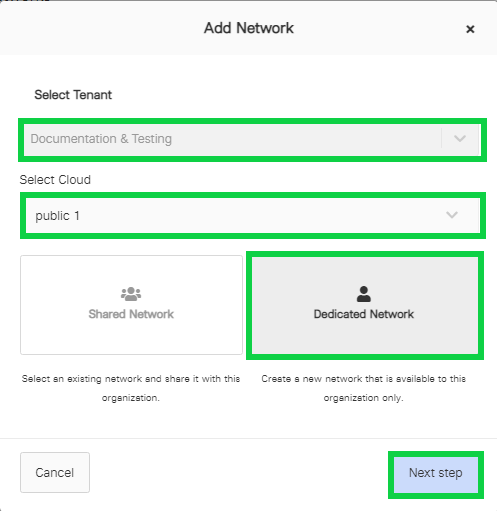
Select the Tenant, select the Cloud, the Dedicated Network, and then click ‘Next Step’.
Quick Tip:
You can set up a new network from either the private cloud or the public cloud. Xelon provides the option to request private cloud resources that are not shared across multiple tenants.
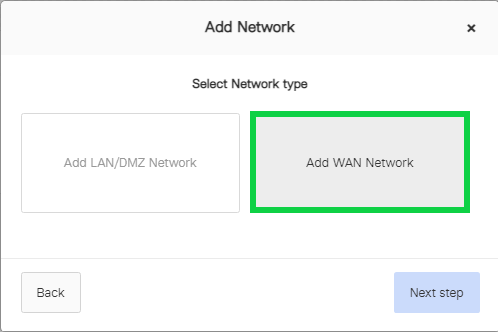
Select the ‘Add WAN Network’ button and click ‘Next step’.
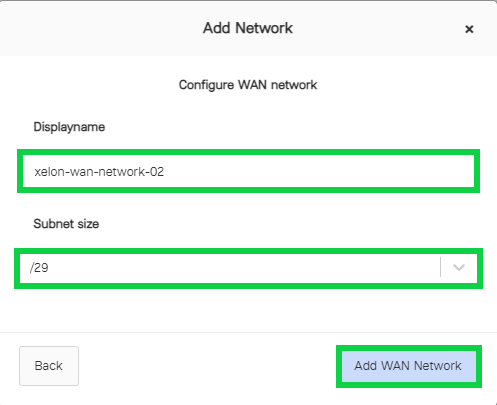
Assign your Wide Area Network (WAN) a display name, select the Subnet size and then click ‘Add WAN Network’.
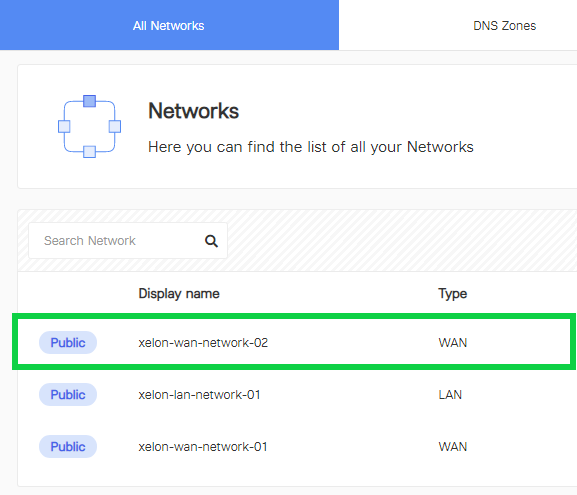
We should now see our new WAN among the list of networks.
Create a new Local Area Network (LAN) that the Web Application Firewall will use to communicate with the backend nodes. Click on the ‘Create Network’ button again, select Dedicated Network, click the ‘Next Step’, choose ‘Add LAN/DMZ Network’, and then click ‘Next step’.

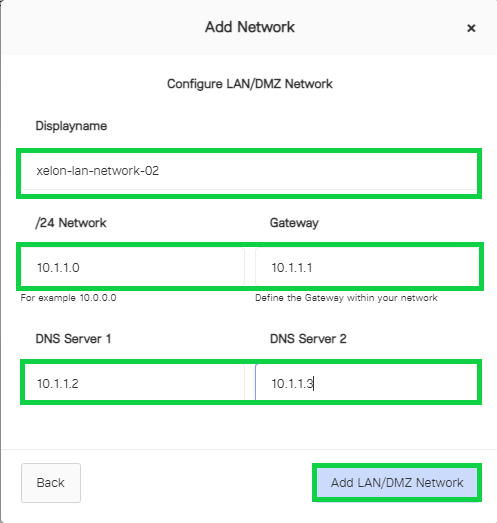
Give your LAN a Display name, assign it a /24 CIDR network, the Gateway, and the DNS Servers, and then click Add LAN/DMZ Network.
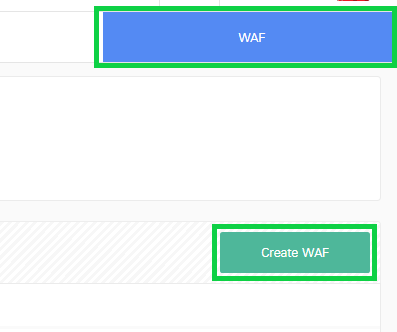
To start setup a WAF, select the Networking section on the Xelon dashboard, select WAF, then click ‘Create WAF’.
Name the WAF, select ‘Device WAF’, choose Dedicated External Network, select the appropriate WAN network and Internal network LAN.
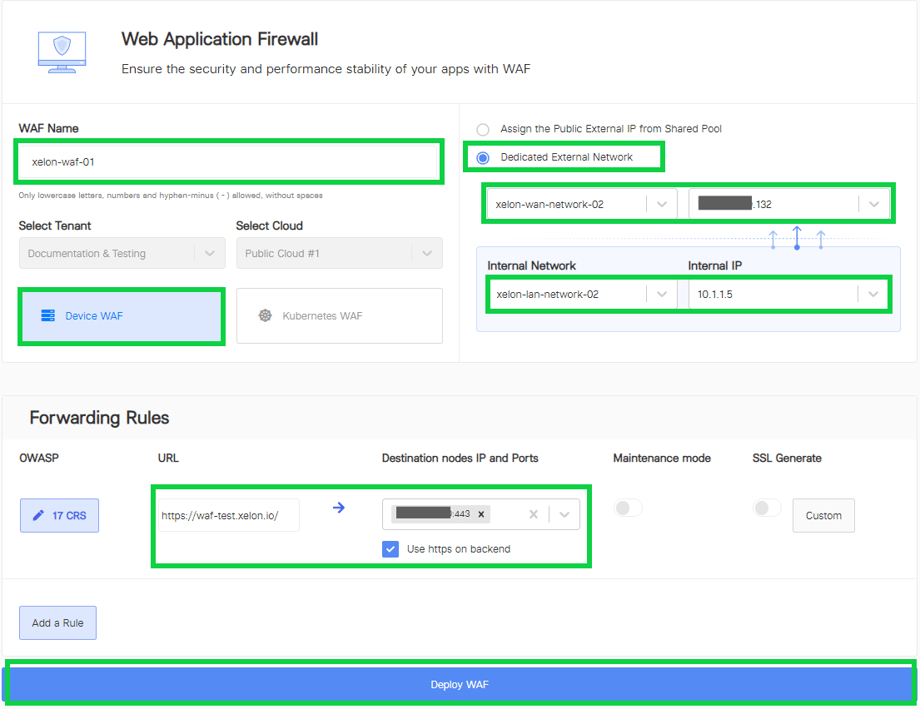
Assign the forwarding rules to the destination nodes, ports, and select HTTPS, then click ‘Deploy WAF’. It takes about five to eight minutes to have a new WAF deployed in the Xelon HQ.
Quick Tip regarding Setup WAF:
You can also deploy a WAF for a Kubernetes cluster so that you protect the containerized applications running on your cluster nodes.
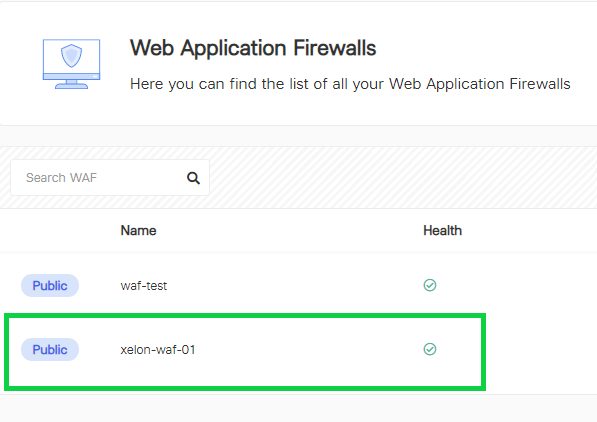
After the WAF is created, it should be visible in the list of available Web Application Firewalls. Click on the new WAF.
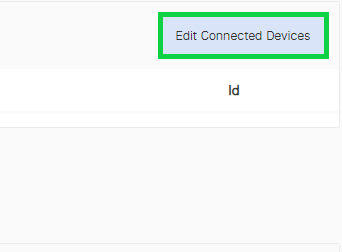
Click on ‘Edit Connected Devices’ to assign a device to the WAF.
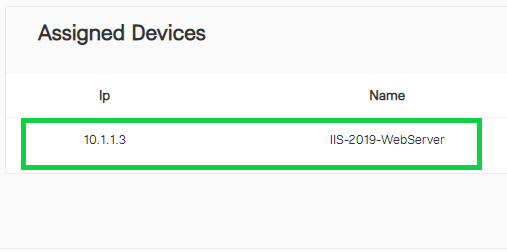
Select the device to assign to the Web Application Firewall and then click ‘Confirm’.
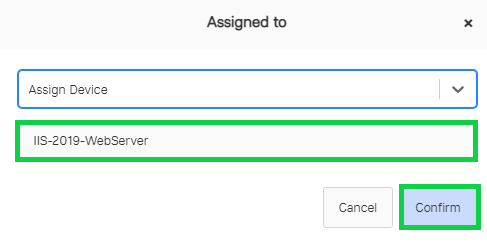
Once you click ‘Confirm’, a new device will appear under the ‘Assigned Devices’.
Quick Tip:
You can assign more than one device to a single instance of the Web Application Firewall.
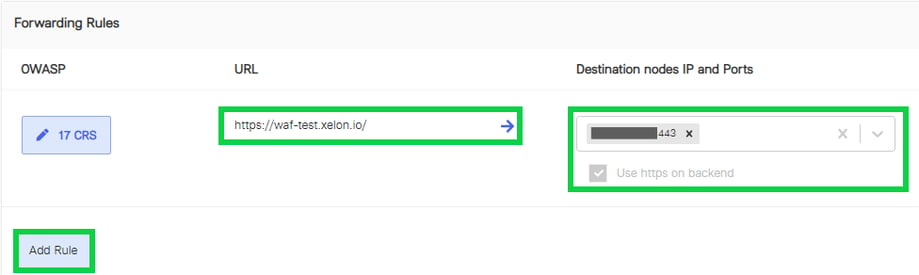
Add forwarding rules to the WAF. Make sure to use HTTPS on the backend.
Quick Tips:
- You can add multiple rules to your WAF. It is possible to add personalized exclusions to the forwarding rules.
- You can also turn on your WAF in maintenance mode if you are making changes to the WAF and don’t want to affect the web applications workload.
- The SSL Generate feature enables you to generate a custom SSL certificate.
Conclusion on Setup WAF with the Xelon HQ
The Xelon HQ makes spinning up a Web Application Firewall (WAF) easy in a world of complex web application security services.
Whether you are building a Web Application Firewall for your web server, virtual machines or Kubernetes clusters, it is set up as a managed service to ease the control and configurations that a user might have to make.
If there are any open questions how to setup WAF, feel free to contact our support team: support@xelon.ch
What are your Feelings:
Feel free to Share this Article:

Leave a Reply
Your email address will not be published. Required fields are marked *