


This article provides a step-by-step procedure on how to deploy a MongoDB using Kubernetes. To show this example we use the platform Xelon HQ. Technically, setting up MongoDB as a cluster on K8s means installing the three layers of MongoDB architecture using separate processes.
However, to configure the cluster on Xelon, you need to activate the environment in your system to support the MongoDB cluster. For this, you need to use the msiexec.exe command from the command line.
Installation of MongoDB Enterprise Edition
To set up the database in a cluster on Xelon, you need to use MongoDB 4.0 Enterprise Edition and higher. However, if you would like to use a different version of MongoDB then you need to choose a version together with the required documentation for successful configuration. To configure MongoDB Enterprise Edition:
Download the MongoDB Enterprise .msi installer here.

Run the window installer from the command interpreter depending on your operating system

In this case, we will be using windows OS. The command interpreter installs the MongoDB binaries which are then used to configure the cluster on Xelon. The binaries include MongoDB Compass
From the Command Interpreter, head to the directory which contains the .msi installation binary and run:
msiexec.exe /l*v mdbinstall.log /qb /i mongodb-windows-x86_64-enterprise-4.4-signed.msiTo suppress the MongoDB Compass, you MUST explicitly include
SHOULD_INSTALL_COMPASS="0" argument clause. Since we are setting the clause in the Xelon HQ, you need to configure the Kubernetes. To do this, set up the Kubernetes cluster which will be responsible for deploying the database cluster.
Setting up MongoDB
Now that you have installed the MDB setup, you need to install the .yaml directories on the router and config servers as follows:
server: "https://explicitip/k8s/clusters/c-6n7xc"

For simplicity, this is referred to as the config server. Never use apt-get when installing MongoDB as there is no current version. Instead, use the following steps to configure it.

Note that the steps install Mongos (router), Mongod (config and shared server) as three separate packages. To achieve this you need to initiate three open firewall ports 27017, 27018, and 27019 between the servers.
- Config Server
- Log in to the designated config server
- Then, set up the three servers as shown below:
- Edit config file
- Start process
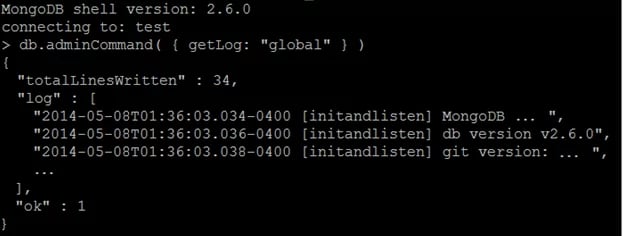
- Check log for errors
- Log into the shell to do further configuration
Why do we need secrets in pods?
Secrets are used for keeping and preserving applications/user/pass of a database, which can be further referenced by other container apps which is crucial to deploying a MongoDB application using Kubernetes.
Minimal yaml files needed
For successful setup, four kinds of files are required. The user can opt to run the commands separately or combine the four files into one.
Deployment yaml file
The deployment yaml file includes the container that are combined and pulled while the cluster deploys. It also contains crucial information including configured secrets, CPU resources, and location where the volume has been mounted.
kubectl --kubeconfig=config-e044b4259991.yaml --insecure-skip-tls-verify get nodes
users:
- name: "k8s-technical-writer-cluster"
user:
token: "kubeconfig-user-hvpzh:r57s2f6sqlqfmkmxmxmfznhqq5w5kfbvzns6z5fpns5rfdhfhllwn2"
Service yaml file
This file is needed to expose internal pods via some external port. Usually the port and target port are the same. The only port that needs to be configured is the “node port“ and it can be any ephemeral port.
Persistent Volume
This is used to allocate the persistent volume resource for MySQL from Kubernetes cluster
ConfigMap
This is used for storing configuration .In our case we will use it for nqinx.
Creating and combining yaml files as demonstrated below
apiVersion: v1
kind: Config
clusters:
- name: "k8s-technical-writer-cluster"
  cluster:
    server: "https://explicitip/k8s/clusters/c-6n7xc"
    certificate-authority-data: "LS0tLS1CRUdJTiBDRVJUSUZJQ0FURS0tLS0tCk1JSUJpVENDQ\
      VM2Z0F3SUJBZ0lCQURBS0JnZ3Foa2pPUFFRREFqQTdNUnd3R2dZRFZRUUtFeE5rZVc1aGJXbGoKY\
      kdsemRHVnVaWEl0YjNKbk1Sc3dHUVlEVlFRREV4SmtlVzVoYldsamJHbHpkR1Z1WlhJdFkyRXdIa\
      GNOTWpFdwpOVEUwTURreE5qSTBXaGNOTXpFd05URXlNRGt4TmpJMFdqQTdNUnd3R2dZRFZRUUtFe\
      E5rZVc1aGJXbGpiR2x6CmRHVnVaWEl0YjNKbk1Sc3dHUVlEVlFRREV4SmtlVzVoYldsamJHbHpkR\
      1Z1WlhJdFkyRXdXVEFUQmdjcWhrak8KUFFJQkJnZ3Foa2pPUFFNQkJ3TkNBQVFYVlk0eGVNNEtkc\
      nQyNzhwclNRMTdKK3hhRnlQaEdPeUVaOUsvYzZpUApJSFRCN2tINSt3eWNEVjhHaWxxd0VYS3FkN\
      WFvOVkrRElCQzNleTBTUVg5Rm95TXdJVEFPQmdOVkhROEJBZjhFCkJBTUNBcVF3RHdZRFZSMFRBU\
      UgvQkFVd0F3RUIvekFLQmdncWhrak9QUVFEQWdOSkFEQkdBaUVBMWtCTjlrNEgKYzlpSXNrMVMyV\
      3plQlhTNkRFWE9xKzJORWpFZnpCaG1EbUVDSVFDRHRYbUZrbG1oL2tENXAxL1A2OGhPdW5EUwo1e\
      Xl0T2NvU25oQXVYaUE3enc9PQotLS0tLUVORCBDRVJUSUZJQ0FURS0tLS0t"

users:
- name: "k8s-technical-writer-cluster"
  user:
    token: "kubeconfig-user-hvpzh:r57s2f6sqlqfmkmxmxmfznhqq5w5kfbvzns6z5fpns5rfdhfhllwn2"


contexts:
- name: "k8s-technical-writer-cluster"
  context:
    user: "k8s-technical-writer-cluster"
    cluster: "k8s-technical-writer-cluster"

current-context: "k8s-technical-writer-cluster"
The apiVersion refers to Kubernetes API resource version that you should use.
“Kind” specifies the type of cluster being config here.
In simple words, the cluster can be described as the data that helps to correctly identify the object, including a name string, server, and the certificate authority data.
Labels can be considered as key-value pairs for easy and fast querying and lookup later.
In this step, data is the key part. It contains the basic Nginx configuration when it is installed as standalone applications
The above config serves MongoDB index.php pages via:
"https://explicitip/k8s/clusters/c-6n7xc"Creating a MongoDB PVC on Kubernetes
To initiate the MongoDB cluster, we need to first create a MongoDB Persistent Volume Claim (PVC), which will be responsible for storing the cluster
kind: PersistentVolumeClaim
apiVersion: v1
metadata:
   name: k8s-technical-writer-mongo-cluster
   annotations:
     volume.beta.kubernetes.io/storage-class: xelon-ha-sc
spec:
   accessModes:
     - ReadWriteOnce
   resources:
     requests:
       storage: 1Gi

$ kubectl create -f xelon-mongo-pvc.yaml
persistentvolumeclaim "xelon-mongo-pvc" created
Deploying MongoDB on Kubernetes
Now that we have a cluster to work on, let’s create MongoDB instance as a deployment object. In this example, we will deploy a single MongoDB cluster. Because Xelon provides an explicit synchronous replication for availability, then a single MongoDB cluster could be the best option to deploy in your Mongo database. Note: Xelon HQ also provides multiple replica sets.
apiVersion: apps/v1
kind: Deployment
metadata:
  name: mongo
spec:
  strategy:
    rollingUpdate:
      maxSurge: 1
      maxUnavailable: 1
    type: RollingUpdate
  replicas: 1
  selector:
    matchLabels:
      app: mongo
  template:
    metadata:
      labels:
        app: mongo
    spec:
      schedulerName: k8s-technical-writer
      containers:
      - name: mongo
        image: mongo
        imagePullPolicy: "Always"
        ports:
        - containerPort: 27017
        volumeMounts:
        - mountPath: /data/db
          name: mongodb
      volumes:
      - name: mongodb
        persistentVolumeClaim:
          claimName: xelon-mongo-pvc

$ kubectl create -f xelon-mongo-app.yaml
deployment.extensions "mongo" created
The deployment of the Mongo Database is defined and explicitly associated with the PVC, xelon-mongo-pvc which was earlier created.

Remove MongoDB Windows Service
To kill/exit the MongoDB Cluster on Xelon K8s, you need to initiate the kill command to release the cluster from the server where it is located. To do this, you need to run sc.exe delete MongoDB command. The command will successfully release MongoDB cluster in the Xelon HQ.
If you have any question how to use MongoDB in the Xelon HQ please feel free to contact our support team!
What are your Feelings:
Feel free to Share this Article:

Leave a Reply
Your email address will not be published. Required fields are marked *