


In this article, we show you how to use Postman API Monitoring to automatically monitor your API endpoints.
Intro
The provision of Rest API endpoints has long been a standard feature of many Software-as-a-Service (SaaS) companies. Especially in the B2B environment, many customers want integration between existing systems and the SaaS provider to simplify deployment.
SaaS providers must therefore ensure that the Rest API endpoints function properly. Automatic rests are indispensable here. Postman offers the necessary tools to monitor their own Rest API interfaces and, for example, to test entire workflows (authentication, creation, modification, deletion).
Create account for Postman API Monitoring
If you don't have a Postman account yet, you can sign up at www.postman.com with just a few clicks. The free plan also allows you to use 1000 monitoring API calls per month, i.e. 33 calls per day. This is enough for smaller projects.
Creating a "Collection"
A collection is a group of one or more API calls. The monitoring we will create later in this document will automatically go through this collection. As an example, we would like to create a monitoring that performs the user login in Xelon HQ, the creation of a Linux server, and the subsequent deletion of the server. This way we monitor the whole chain and would be informed if at any point it does not continue.
To do this, we open the workspaces in the top menu and select our workspace. Under "Collections" we click on "New".
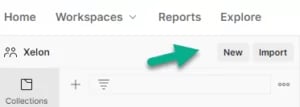
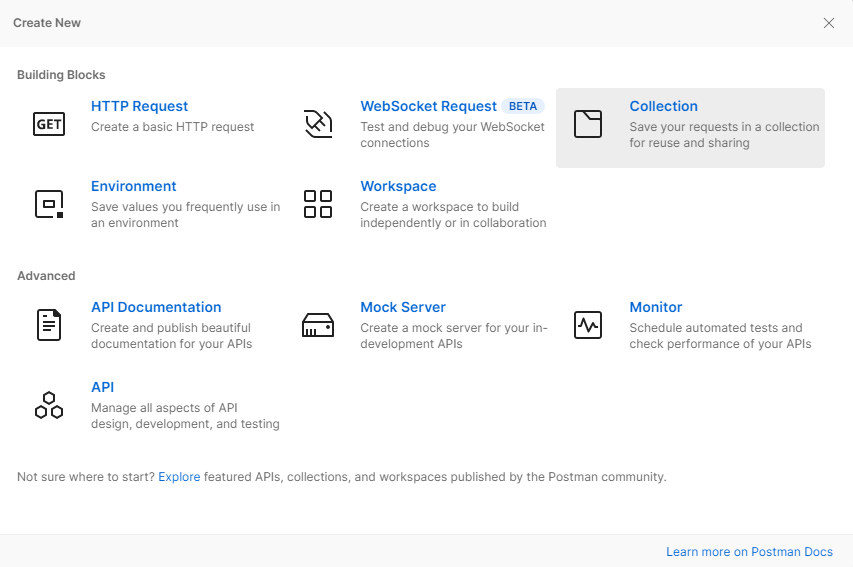
Now select "Collection" to create a new one.
In the new collection, you can now configure various points across the board. For example, you can define the authentication. Important: Do not store any user names/passwords or personal bearer tokens in the collections, as this data is used by everyone with access to the collection. If you want to define authentication at collection level, work with variables.
In our case, we use Bearer Token for authentication. We use "token" as the variable, which is defined as "" in the field.
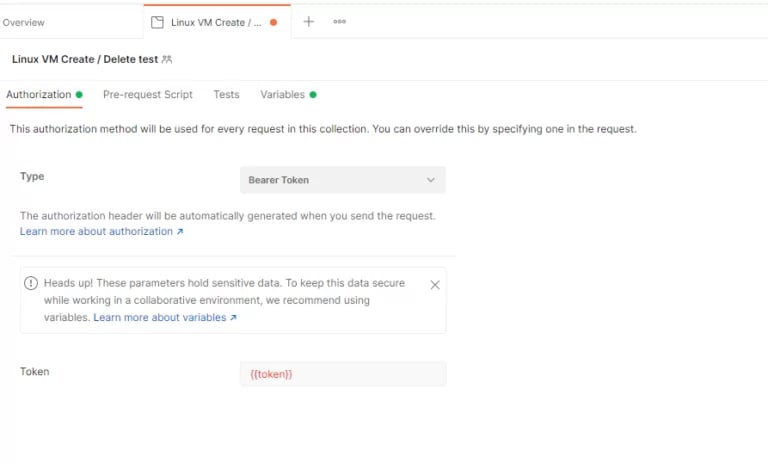
So we have globally specified that the API rests in this collection use Bearer as authentication. We then define which token is used further down in the environment variables.
Configuration of the API Calls
Now we configure the necessary API calls in the collection. In our case there are 4 calls:
Create Linux server
- Create Linux Server
- Verification if server created successfully
- Stop server
- Delete server
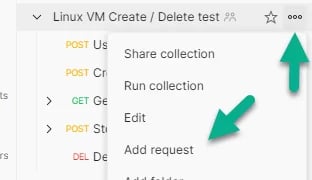
To create the first request, we click on the three dots on the collection and on "Add Request" in the menu.
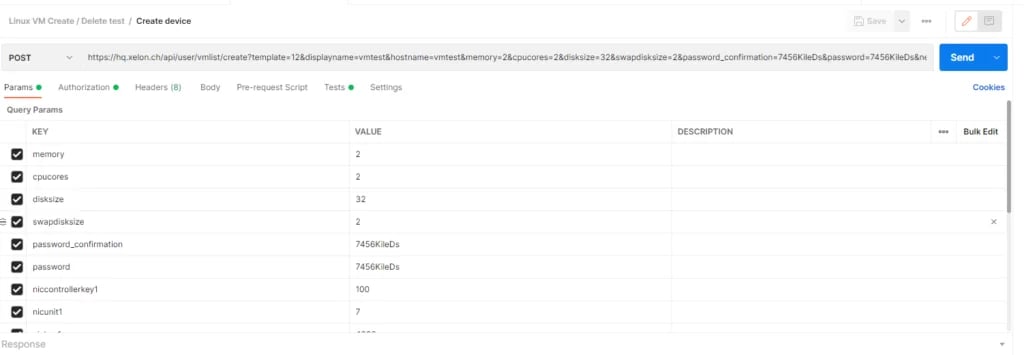
Give the call a name and define the endpoint. In our case, we use a post request with various parameters to create the Linux server.
We leave the authorisation as "Inherit auth from parent" in order to use the collection authorisation. If necessary, a separate authentication can also be used here.
Additional necessary API calls are created in the same way, in our case for the verification, the stop command, and the delete command.
API Response Tests
In the "Tests" tab, you can define whether the API Return should be checked for certain values. It is also possible to save return values in variables in order to use them in the next API call. More about this in this article.
Timeout via pre-request script
Pre-request scripts can be used, for example, to define timeout/delays before the request is executed. By default, Postman executes the next request as soon as the previous one is completed. This can lead to problems if the previous request triggers a task on the backend server that takes a few seconds or maybe even minutes, and the next call depends on a completed task.
The following code in the pre-request script tab delays the execution by 120'000 miliseconds, i.e. 120 seconds:
setTimeout(function(){}, 120000);
Creation of an "Environment"
Variables are defined in the "Environment". Open the "Environments" in the menu on the left and create a new environment via "New".
In the collection above, we have created a variable with the name "TOKEN" for authentication. We now define this variable in the environment.

Of course, other variables can be used in the environment, which are applied within the collection.
Setting up Postman API Monitoring
Now that we have defined the collection and the environment, we can set up our monitoring. To do this, open the "Montitors" in the menu on the left, click on "New" and select "Monitor".
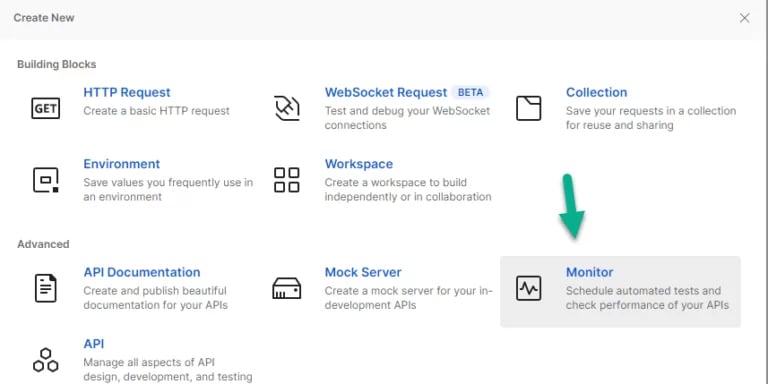
Click on "Monitor existing collection", as we have already created it, and select the collection you have just created.
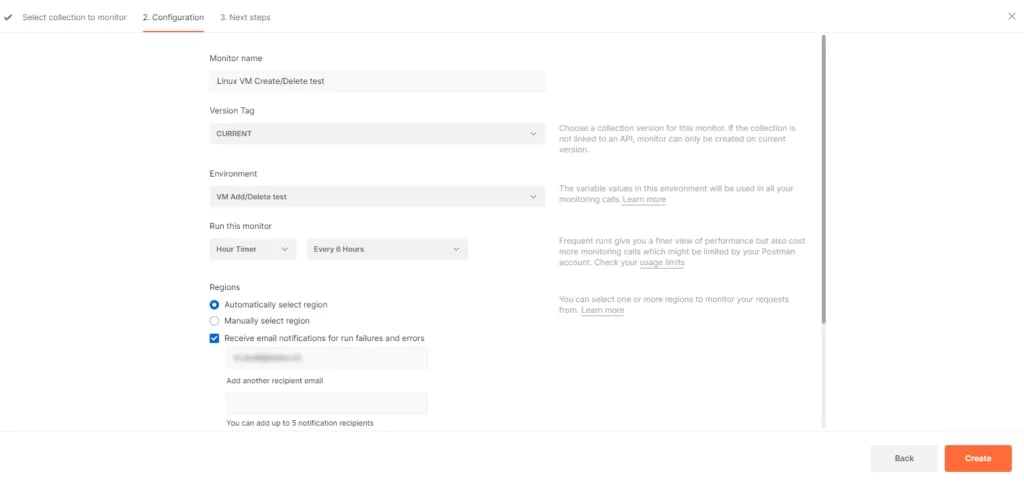
Select a name, the environment created, the frequency of the test and the notification email.
Surveillance
After the successful setup, Postman checks the collection according to the configuration and frequency. In our case, we check the collection every hour. In the reporting we now see the results.
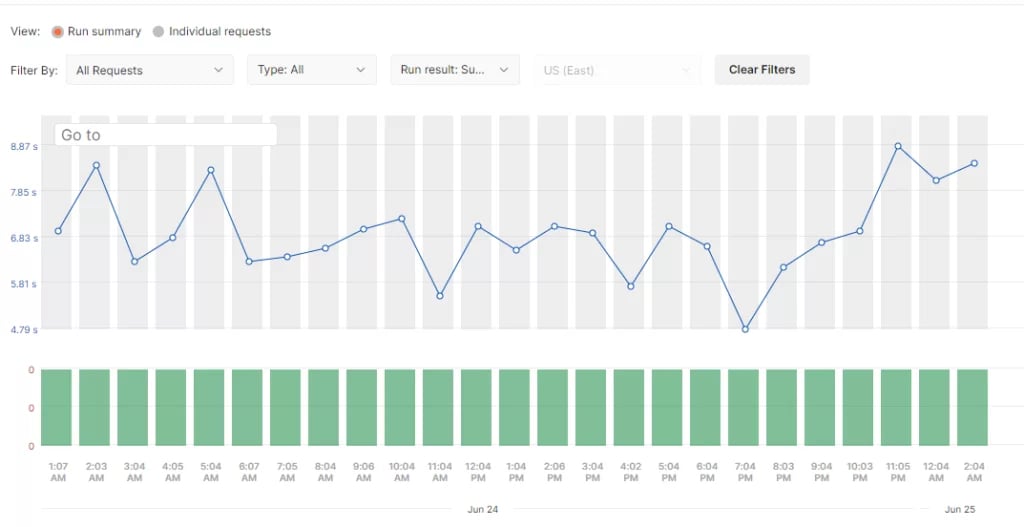
In the event of problems, it is also possible to see exactly which request caused the problem.
Conclusion on Postman API Monitoring
Postman offers a simple and quick way to regularly check the API calls for their functions. Postman also offers a lot of other tools. More information on this can be found in our Knowledge Base or, of course, at www.postman.com.
What are your Feelings:
Feel free to Share this Article:

Leave a Reply
Your email address will not be published. Required fields are marked *