


This article is a how to manual to install gVisor on a Kubernetes cluster to demostrate it in this article we use the platform Xelon HQ.
Introduction to gVisor
gVisor, a Cloud Native Computing Foundation project built initially on the Google cloud platform, is an application kernel that extends security capabilities in a containerized environment.
gVisor introduces two layers of isolation between containerized applications and the host kernel. The tool provides an interface that intercepts operating system calls securely from the sandboxed containerized applications hence improving the security within a containerized application infrastructure.
Quick Tip:
A container sandbox is an isolation boundary between containers and the host kernel that protects operating systems from hackers escaping the container runtime environment; this means anyone can run untrusted code within the sandbox and this will not affect the underlying host kernel.
Why install gVisor?
- Running untrusted code: If your software services have varying dependencies from third-party binaries, this presents a security threat since you might not know which kind of code executes on your clusters, thus introducing a security threat. Additionally, you can also run untrusted code developed by your in-house development team.
- Capturing untrusted user input: For software systems that allow users to upload different types of content files such as videos and images, gVisor enables sandboxing the user input so that clusters are not affected by malicious user input.
Setup options to install gVisor
Prerequisites
- Basic understanding of Docker and Kubectl commands.
- An Xelon HQ Kubernetes Cluster.
- Minimal version of Containerd 1.3.9 installed on your cluster.
Enabling gVisor on Docker
The main focus of this article is to set up gVisor on a Kubernetes cluster. However, before we set it up on K8s (Kubernetes), It would be great to try out and validate gVisor functionality on Docker. If not, you can jump to the containerd section that shows how to set it up on Kubernetes.
To set up gVisor on Docker, you need to have at least Docker version 17.09.0.
In the following steps, we will set up gVisor on Docker using the apt repository installation method.
Step 1: Update the apt-get binaries and add the gVisor apt repository
Update your system’s apt package and enable the package to install packages via HTTPS.
xelonuser@gvisor-ubuntu:/$ sudo apt-get update && \
>sudo apt-get install -y \
>apt-transport-https \
>ca-certificates \
>curl \
>gnupg-agent \
>software-properties-common
Fetch and add the key to sign the gVisor repository.
xelonuser@gvisor-ubuntu:/$ curl -fsSL https://gvisor.dev/archive.key | sudo apt-key add -
Next, add the gVisor repository.
xelonuser@gvisor-ubuntu:/$ sudo add-apt-repository "deb [arch=amd64,arm64] https://storage.googleapis.com/gvisor/releases release main"
Quick Tip:
You can install different versions of gVisor, such as test and production recommended versions. For test versions, gVisor recommends a nightly release (nightly main), and production is termed as release (release main). To achieve this, change the end of the add-apt-repository command to the gVisor repository branch name.
Step 2: Enable the gVisor add-on to Docker.
Install the runsc runtime package on your docker engine.
xelonuser@gvisor-ubuntu:/$ sudo apt-get update && sudo apt-get install -y runsc
Next, add the runsc runtime entry to your Docker configuration.
xelonuser@gvisor-ubuntu:/$ sudo runsc install
Restart the docker engine for changes to take effect.
xelonuser@gvisor-ubuntu:/$ sudo systemctl restart docker
We can now run a node docker container with the runsc runtime environment and a gVisor addon.
xelonuser@gvisor-ubuntu:/$ docker run --runtime=runsc --rm node
After successfully fetching the image and spinning up a container, we can verify that our container is running in a gVisor sandbox by using the dmseg utility to print out live messages from the kernel.
xelonuser@gvisor-ubuntu:/$ docker run --runtime=runsc -it node dmesg
Then, we should now be able to validate that our container is running in a sandboxed environment.
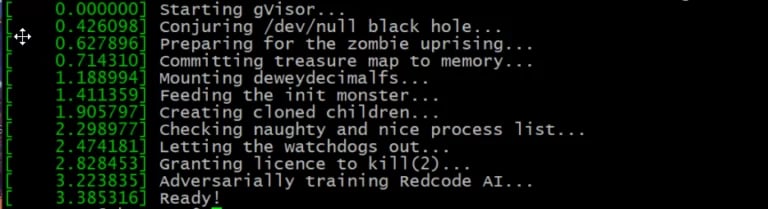
Enable gVisor on Docker
Enabling gVisor on Kubernetes with Containers
To enable gVisor on our Kubernetes cluster, we need to make sure that we have containerd as our container runtime environment. It is also essential to have runsc and containerd-shim-runsc-v1 installed on our cluster; we already installed both using the Docker apt installation option of gVisor, but you can still set it up manually by following the steps below.
Step 1: Setup runsc and containerd-shim-runsc-v1
Install runsc and containerd-shim-runsc-v1 if you have not already.
xelonuser@gvisor-ubuntu:/$ (
set -e
ARCH=$(uname -m)
URL=https://storage.googleapis.com/gvisor/releases/release/latest/${ARCH}
wget ${URL}/runsc ${URL}/runsc.sha512 \
${URL}/containerd-shim-runsc-v1
${URL}/containerd-shim-runsc-v1.sha512
sha512sum -c runsc.sha512 \
-c containerd-shim-runsc-v1.sha512
rm -f *.sha512
chmod a+rx runsc containerd-shim-runsc-v1
sudo mv runsc containerd-shim-runsc-v1
/usr/local/bin
)
Update the containerd configuration file to include runsc runtimes. Add the configuration below to the end of file (EOF) of the containerd config.toml file
xelonuser@gvisor-ubuntu:/$ cat <<EOF | sudo tee
/etc/containerd/config.toml
version = 2
[plugins."io.containerd.runtime.v1.linux"]
shim_debug = true
[plugins."io.containerd.grpc.v1.cri".containerd.runtimes.runc]
runtime_type = "io.containerd.runc.v2"
[plugins."io.containerd.grpc.v1.cri".containerd.runtimes.runsc]
runtime_type = "io.containerd.runsc.v1"
EOF
Restart the containerd service for changes to take effect.
xelonuser@gvisor-ubuntu:/$sudo systemctl restart containerd
Step 2: Install critctl
Download and install the crictl binary.
xelonuser@gvisor-ubuntu:/$ {
wget https://github.com/kubernetes-sigs/cri-tools/releases/download/v1.13.0/crictl-v1.13.0-linux-amd64.tar.gz
tar xf crictl-v1.13.0-linux-amd64.tar.gz
sudo mv crictl /usr/local/bin
}
Quick Tip:
critcl (Compiled Runtime in Tcl) is a package that provides a quick and fast compilation of C code.
Now add containerd to the crictl configuration file.
xelonuser@gvisor-ubuntu:/$ cat <<EOF | sudo tee /etc/crictl.yaml
runtime-endpoint: unix:///run/containerd/containerd.sock
EOF
Step 3: Create the node sandbox in gVisor
Pull the node.js image from the Docker hub.
xelonuser@gvisor-ubuntu:/$ sudo crictl pull node
Next, create the sandbox file.
xelonuser@gvisor-ubuntu:/$ cat <
{
"metadata": {
"name": "node-sandbox",
"namespace": "default",
"attempt": 1,
"uid": "f50abfaea544a07b54b"
},
"linux": {
},
"log_directory": "/tmp"
}
EOF
Create a pod in gVisor.
xelonuser@gvisor-ubuntu:/$ SANDBOX_ID=$(sudo crictl runp --runtime runsc sandbox.json)
Step 4: Run node.js in a container sandbox
Create the node.js container file and the creation request.
xelonuser@gvisor-ubuntu:/$ cat <<EOF | tee container.json
{
"metadata": {
"name": "node"
},
"image":{
"image": "node"
},
"log_path":"",
"linux": {
}
}
EOF
Create the node container.
xelonuser@gvisor-ubuntu:/$ CONTAINER_ID=$(sudo crictl create ${SANDBOX_ID} container.json sandbox.json)
Start the node container.
xelonuser@gvisor-ubuntu:/$ sudo crictl start ${CONTAINER_ID}
After running the command, it will display your container Id.
To inspect the created pod, run the crictl command below.
xelonuser@gvisor-ubuntu:/$ sudo crictl inspectp ${SANDBOX_ID}
The command will display the properties of your pod, and you’ll also be able to see that the Sandbox is ready.
xelonuser@gvisor-ubuntu:/$ sudo crictl inspectp ${SANDBOX_ID}
{
"status": {
"id":
"b8935bd5d3f0ee36d38c626d9758a88a24b4f6b79be9490564c240f69aaab37a",
"metadata": {
"attempt": 0,
"name": "node-sandbox",
"namespace": "default",
"uid": "f50abfaea544a07b54b"
},
"state": "SANDBOX_READY",
"createdAt": "2021-05-06T12:18:38.869635146Z",
"network": {
"ip": "172.16.0.4"
},
"linux": {
"namespaces": {
"options": {
"ipc": "POD",
"network": "POD",
"pid": "POD"
}
}
Inspect the node.js container that you have started.
xelonuser@gvisor-ubuntu:/$ sudo crictl inspect ${CONTAINER_ID}
{
"status": {
"id": "c2651215de45b8a78889fe5a169d15ca7990215d9519b83822206c68affcea9f",
"metadata": {
"attempt": 0,
"name": "node"
},
"state": "CONTAINER_EXITED",
"createdAt": "2021-05-06T14:55:51.56694733Z",
"startedAt": "2021-05-06T14:55:59.698003828Z",
"finishedAt": "2021-05-06T14:55:59.792788782Z",
"exitCode": 0,
"image": {
"image": "docker.io/library/node:latest"
},
"imageRef":
"docker.io/library/node@sha256:25516f3de85ebf588e29d81052495d2e1177b55cddbd7ddab2f5ff2c4496dd5e",
"reason": "Completed",
"message": "",
"labels": {},
"annotations": {},
"mounts": [],
"logPath": "/tmp/node.0.log"
},
"info": {
"sandboxID": "75cbc04cd23df33e2e63cade1bc7242308bb62230622109e558b2f86b079d869",
The output shows that the container started and exited successfully.
Next, we can also verify that the node.js container is running in the gVisor sandbox by running the command below. This will only return results if the container is still running.
xelonuser@gvisor-ubuntu:/$ sudo crictl exec ${CONTAINER_ID} dmesg | grep -i gvisor
Step 5: Add the Kubernetes runtime class for gVisor.
Additionally, we can install the Kubernetes runtime class for gVisor following the set of commands below.
Install the runtime class for gVisor.
xelonuser@gvisor-ubuntu:/$ cat &lf;&lf;EOF | kubectl apply -f -
apiVersion: node.k8s.io/v1beta1
kind: RuntimeClass
metadata:
name: gvisor
handler: runsc
EOF
After running the command, we shall receive a status of runtime-created.
runtimeclass.node.k8s.io/gvisor created
Create a Pod with gVisor runtime class.
xelonuser@gvisor-ubuntu:/$ cat &lf;&lf;EOF | kubectl apply -f -
apiVersion: v1
kind: Pod
metadata:
name: node-gvisor
spec:
runtimeClassName: gvisor
containers:
- name: node
image: node
EOF
We shall then be able to see that our pod is successfully created.
pod/node-gvisor created
To verify that the pod is up, run the command shown below.
xelonuser@gvisor-ubuntu:/$ kubectl get pod nginx-gvisor -o wide
Bonus Tip:
gVisor does not possess security features such as modifying the security defaults of your Kubernetes Clusters, controlling access to the CPU, memory, and disk usage by your containerized applications.
In addition, gVisor does not control the network access to your pods and provides no protection to your host kernel from security threats outside the sandboxed containers, so additional security measures need to be in place to protect Kubernetes Cluster nodes.
Conclusion
gVisor limits the attack surface of your containerized applications with a defense-in-depth security model by sandboxing containers, pods and restricting the execution of insecure code on your host operating system kernel. This article covered how to enable gVisor on Docker and also dove into enabling gVisor on a Kubernetes Cluster with the containerd runtime.
If you still have any question how to: install gVisor on a Kubernetes Cluster in Xelon HQ please let us know! Contact our DevOps free of charge!
What are your Feelings:
Feel free to Share this Article:

Leave a Reply
Your email address will not be published. Required fields are marked *